Difference between revisions of "WEAT"
(added weat page) |
(→Icons and Symbols) |
||
| Line 117: | Line 117: | ||
{| | {| | ||
| − | + | | [[File:weat_image2.png|49x48px]] | |
| − | + | | In the source editor, this question mark marks the lines that have at least one explanation. | |
|- | |- | ||
| [[File:weat_image14.png|54x47px]] | | [[File:weat_image14.png|54x47px]] | ||
Revision as of 21:38, 1 April 2024
The Worked Example Authoring Tool (WEAT) is an innovative tool designed to facilitate the creation of worked examples for programming education through a human-AI collaboration approach. By integrating ChatGPT, WEAT assists instructors in generating line-by-line explanations for code examples in Java and Python. Instructors can provide the code and problem statement, and WEAT uses ChatGPT to generate explanations for each line of code. These explanations can then be reviewed, edited, and added into the worked examples, streamlining the process of creating educational programming materials.
This tool consists of three important pages:
Sources, a source is a PCEX example or challenge; which has a title, problem description, and line-by-line annotated source code.
Activities, an activity is a bundle of multiple sources either as an example or challenge.
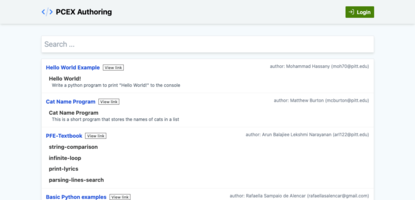
Hub, is where all publicly available activities are listed which can be searched by title, used, or embedded within your tool (through iframe).
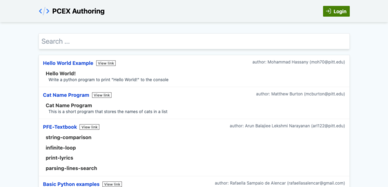
After opening the PCEX Authoring Tool, you will land on the Hub page. Click Login, provide your account credentials and login into the tool. Then you will be redirected back to the Hub page.
Fig 1) PCEX Authoring Tool: Hub Page.
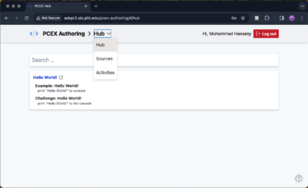
In the Hub page, click on the navbar, then click on "Sources" to navigate to Sources page.
Fig 2) PCEX Authoring Tool: Hub Page - when user is logged in.
Contents
Sources
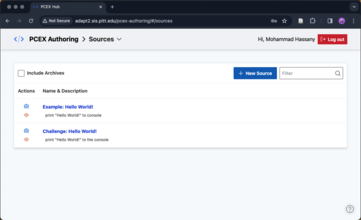
This page contains the list of sources you have created. Click "New Source" to create a new source.
Fig 3) PCEX Authoring Tool: List of defined sources.
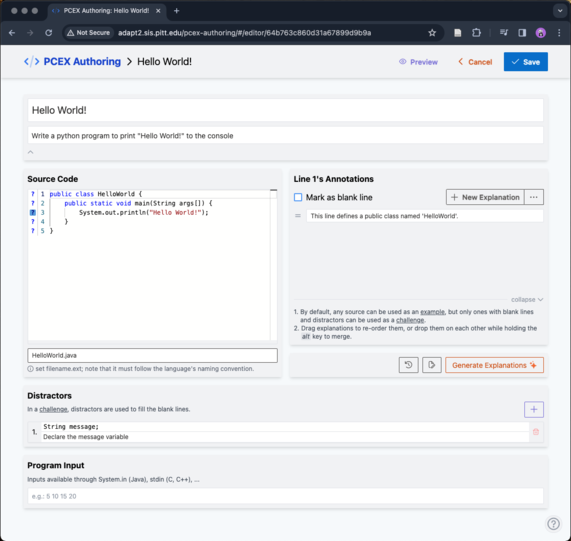
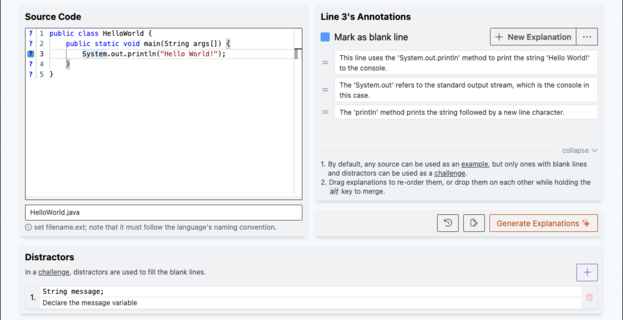
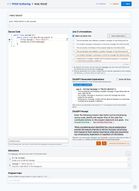
A source has a title, problem description, and line-by-line annotated source code. Problem description can have multilines. Each line in the source code can be annotated either by providing explanations for it and/or marked as blank line.
Fig 4) PCEX Authoring Tool: Creating a source (e.g: Hello World!).
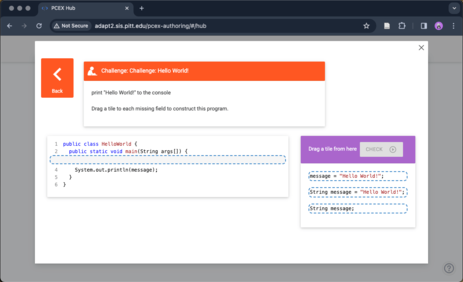
In a PCEX challenge, a blank line creates a parson-style problem that can be filled by the student with available distractors (check Figure 5). A distractor can be defined in the "Distractors" section when creating or editing a source.
Fig 5) PCEX Authoring Tool: A PCEX challenge preview.
Fig 6) PCEX Authoring Tool: Define distractors (bottom section) for blank lines.
Explanations for important lines of code can be generated using the gpt-3.5-turbo model. Clicking on the "Generate Explanations" button will generate explanations using the default prompt. Newly generated explanations will be appended to the line and are distinguished with orange border color (check Figure 9).
Next to the "Generate Explanations" button, there is the ![]() history and
history and ![]() custom prompt toggle buttons. Clicking on the
custom prompt toggle buttons. Clicking on the ![]() button will show the previously generated explanations (check Figure 7) for this source. While clicking on the
button will show the previously generated explanations (check Figure 7) for this source. While clicking on the ![]() provide the ability to customize the ChatGPT prompt (check Figure 8).
provide the ability to customize the ChatGPT prompt (check Figure 8).
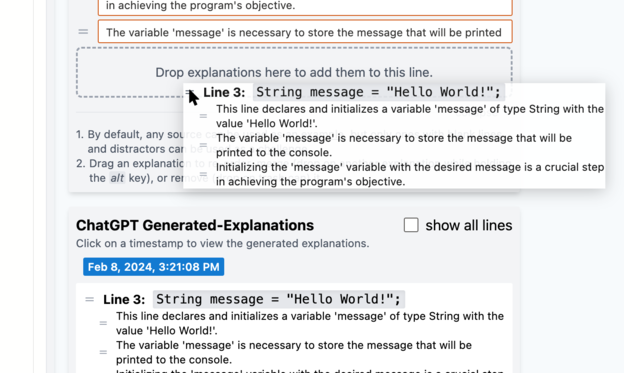
As described in the user interface, these explanations can be dragged by the bars into the Annotations panel to be used/added to the currently selected line (check Figure 8). By default, previously generated explanations for the currently selected line are shown; click the "show all lines" to show all generated explanations. In the history panel click on another date/time to load explanations specific to that generation session.
Fig 7) Source Editor: ChatGPT Generated-Explanations (History).
Fig 8) Source Editor: Dragging previously generated explanations from history into the Annotations panel.
In Figure 9, the ChatGPT prompt can be viewed. This is the default prompt used by the tool when "Generate Explanations" is clicked. If by any reason, it requires any change, you can change the color-marked sections. After customizing the prompt, click "Generate Explanations" to generate the explanations.
Fig 9) Source Editor: Customize ChatGPT Prompt
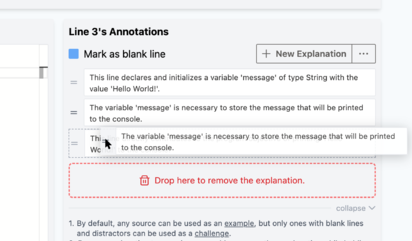
In the Annotations panel, explanations can be dragged by the bars. Drag and drop an explanation on another explanation to change their order, or hold "alt" key while dropping to append/merge them together, or drop the explanation on to the red trash can area to remove it (you will be asked to confirm this action since it is irreversible).
Fig 10) Source Editor: Drag explanations to reorder, merge or remove.
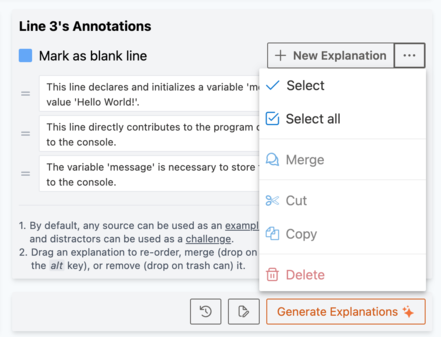
In case you want to merge, cut, copy, or delete multiple explanations, click on the ![]() button to see more actions. Select explanations by clicking either the "Select" (to start the selection, then click on the
button to see more actions. Select explanations by clicking either the "Select" (to start the selection, then click on the![]() checkboxes next to explanations to select), or "Select all" to select all the explanations. Then you can cut, copy, and delete the selected explanations.
checkboxes next to explanations to select), or "Select all" to select all the explanations. Then you can cut, copy, and delete the selected explanations.
Fig 11) Source Editor: Annotations panel more actions.
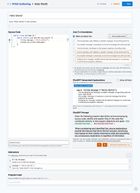
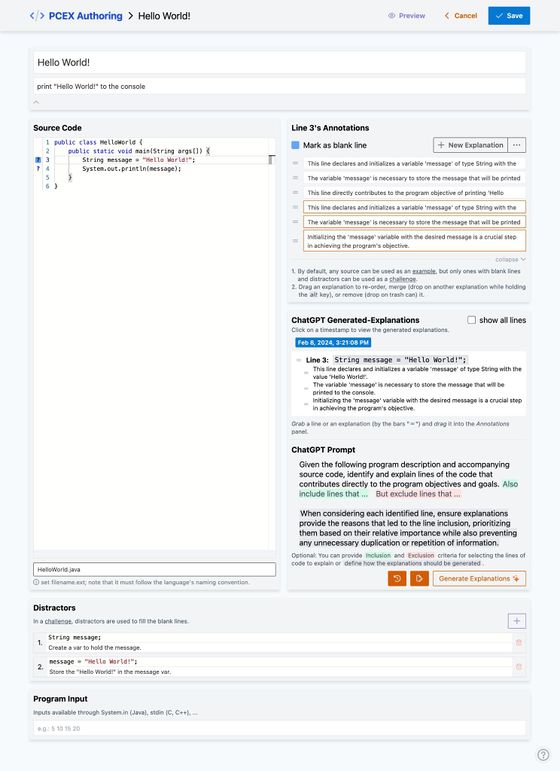
Fig 9) PCEX Authoring Tool: Source Editor Full View.
Activities
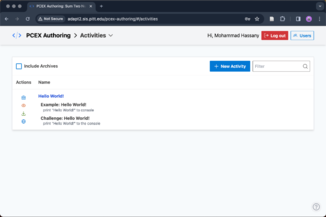
This page contains the list of activities you have created. Click "New Activity" to create a new activity.
PCEX Authoring Tool: List of defined activities.
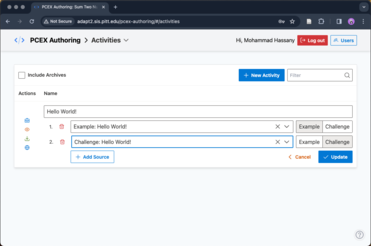
An activity contains one or more sources, either as an example or challenge.
After creating/updating a source or activity, click the preview button to ensure the activity is processed (/cached) and can be previewed by students later.
PCEX Authoring Tool: Creating an activity(e.g: HelloWorld!).
Hub
This page lists all publicly shared activities by different authors. You can click on the title to preview the activity, or click the open-in-new-tab icon next to the title to open it in a new tab (this url can be embedded in an iframe within your tools)
PCEX Authoring Tool: Hub Page.
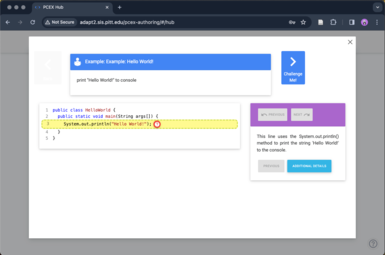
PCEX Authoring Tool: Activity Preview.
Icons and Symbols
The following icons are used within this tool, and you need to familiarize yourself with them.

